Mortise and Tenon Tool
Use the Mortise and Tenon Tool to draw a tenon standing out from an edge of one part, and the mortise (the hole) it goes into in another, the same size: a rail into a leg, a shelf through a side, or a laser-cut tab and slot.
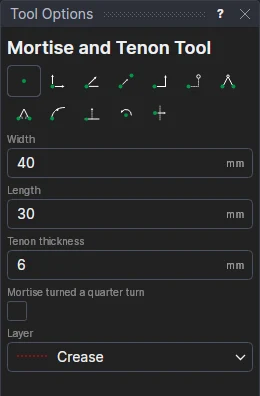
Usage
- Fill in the tenon's Width (along the edge: the mortise's length), Length (how far it stands out: the mortise's depth) and Thickness (the mortise's width).
- Tick Mortise Turned A Quarter Turn for a mortise square to the edge's direction rather than along it.
- Choose the layer for the mortise.
- Click the edge the tenon stands out from, where it goes: the tenon is centred there. On a closed outline it stands out of the part; on a line, it stands out on the side of the line you click.
- Mark* the middle of the mortise. The tenon and the mortise are shown as you move.
Press Escape before marking the point to let the edge go and pick another.
A joint that follows the drawing
The edge is split either side of the tenon, which stays a fraction of the way along it, and the tenon's sides are square to it. The width (TNW1), length (TNL1) and thickness (TNT1) are new variables that both the tenon and the mortise are drawn from, so changing one keeps the joint a fit; moving the mortise's point moves the mortise. The boxes then show the variables, so the next joint shares them.
*Depending on the chosen snap mode, several clicks may be required to define the point parametrically. Read more about Snap Modes