Mitre Frame Tool
Use the Mitre Frame Tool to make a frame round a picture from its moulding: the four pieces, mitred at 45° at both ends, each with the length it is cut to.
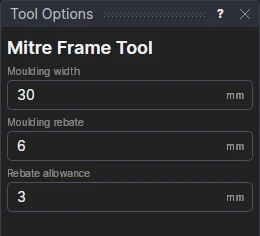
Usage
- Draw the picture (or what the frame holds: the picture, its mount, the glass) as a rectangle its size.
- Fill in the Moulding width (across the moulding's face), the Moulding rebate (how far the rebate reaches in under the moulding's lip) and the Rebate allowance (how much bigger than the picture the rebate is, in all: half each side, so the picture drops in).
- Click the picture.
The four pieces are drawn where they go round the picture, on its layer. Each piece's cut length, long point to long point - the picture and the allowance, and twice the moulding's width less its rebate - is written along it on the Dimension layer, and kept up to date.
A frame that follows the picture
The pieces' corners are points on the picture's corners and the sizes, which are kept in new variables (FRMW1, FRRB1, FRAL1) the next frames share: change the picture's size or the moulding and the pieces and their lengths follow.
Ordering the moulding
File › Reports… › Moulding order list finds the frames in the drawing and lists each piece's long point and its length along the rebate (to order it chopped), the moulding to buy in lengths (each side along the rebate and a moulding width for each mitre, with saw cuts and an offcut allowance), and the glazing, mount board and backing that fit. It takes the rebate from FRRB1. See Reports.
See also: Mount Aperture Tool, Picture framing, Carpentry.
In 3D
A 3D page shows the frame made: the moulding swept round the picture, mitred, with the backing, artwork, mount and glass in its rebate (Wrapping and sweeping).