Part Mark Tool
Use the Part Mark Tool to put part (piece) marks on parts: a prefix and a number, which goes up by one after each mark, etched by the laser or marked by the punch, so each part can be found on the drawings and in the shop. It is a tool of the structural steel, sheet metal, pipework and HVAC trades.
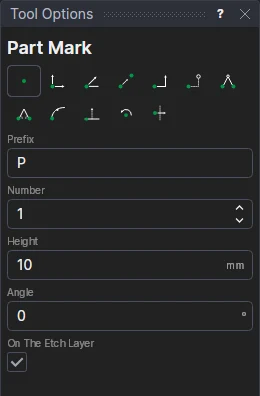
Usage
- Type the Prefix (B for beams, P for plates, a job number …) and the Number of the first mark.
- Fill in the text's Height and the Angle it is turned by (degrees anticlockwise; a number, a variable, or an expression).
- Leave On The Etch Layer ticked to put the marks on the Etch layer, added if the drawing hasn't one (marked, not cut: set the machine to etch or mark it); or untick it and choose another layer.
- Click* where each mark goes: its middle. The status bar says which mark comes next.
It follows the drawing
The height and the angle are kept in new labelled variables (PMH1, PMA1) that the next marks
share, and each mark is drawn by a block on the point you marked, its TEXT's
height and rotation those variables: move the point, or change the height or the angle, and the marks follow (change
PMA1 to turn them all). Type a variable's name in the Angle box (or an expression such as RTOD(ANGLE(P2-P1)),
the direction of a line) to turn the marks with it.
To cut or engrave the marks as shapes rather than text, turn them into curves with the Text to Outlines Tool.
*Depending on the chosen snap mode, several clicks may be required to define the point parametrically. Read more about Snap Modes
See also: Text, Structural Steel, Sheet Metal.