Stitch Line Tool
Use the Stitch Line Tool to put a line of stitching along an edge of a leather (or upholstery, or canvas) piece: a line the stitch margin in from the edge, and along it a hole, slit or mark at each stitch, as many as fit at about the stitch pitch, spaced evenly so the stitching fits the line exactly. Cut by a laser or a die, or used to prick the piece by hand, the holes of pieces made the same way line up when they are put together.
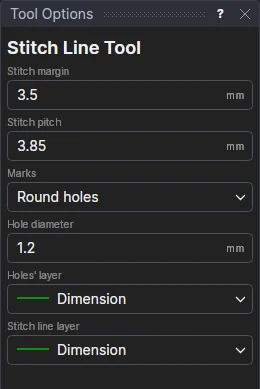
Usage
- Fill in the Stitch margin (from the edge to the stitch line) and the Stitch pitch (about how far apart the stitches are: your pricking irons' pitch, 3.85 mm for the usual 4 mm irons).
- Choose the Marks:
- Round holes, the Hole diameter across, to punch or cut.
- Slits (diamond chisel), the Mark length long, slanting across the line at the Slit angle, as a diamond chisel or pricking iron makes them.
- Marks across: short marks square across the line, to prick through by hand.
- Choose the Holes' layer (cut, by default) and the Stitch line layer (the Dimension layer, by default: a line to see, not cut).
- Click the edge: inside a closed piece the stitching goes inside it; along an open edge it goes on the side you click. The stitch line is shown as you move, with its holes.
Round a closed edge the stitches go all the way round, evenly; along an open edge they go from end to end, a hole at each end.
Stitching that follows the piece
The stitch line is an OFFSET of the edge, the margin a variable (STM1). The
number of stitches is a variable too (STN1 = MAX(1,ROUND(LENGTHOF(@12)/STP1))), worked out from the line's
length and the pitch (STP1), and the holes are a block along the line: make the piece
bigger, or change the pitch, and the stitches are counted again and spaced evenly to fit. The hole size (STD1) and
the slit angle (STA1) are variables as well, and the options then show the variables, so the next stitch lines share
them.
See also: Skive Tool, Leather Goods.