True-Shape Nesting
ParametrIQ True-Shape Nesting lays out parts of any shape, each in the quantity you want, on hides, remnants and
offcuts of any shape, then on full sheets if you want them. You mark the flaws on each hide by clicking where they are,
and the parts are kept clear of them; and when flaws are found after the layout is made, Check flaws finds the
parts over them. It lays out with ParametrIQ CAD's own True-Shape Layout, so the layout is what CAD would
make. It is a separate, free program (PiQ.Nesting.App).
Getting True-Shape Nesting
True-Shape Nesting is free: it needs a ParametrIQ account and its own licence, which costs nothing. Ask for it under ParametrIQ True-Shape Nesting on your account's Licenses page, download and install it, and activate it when it first starts, as Free Apps describes.
The parts
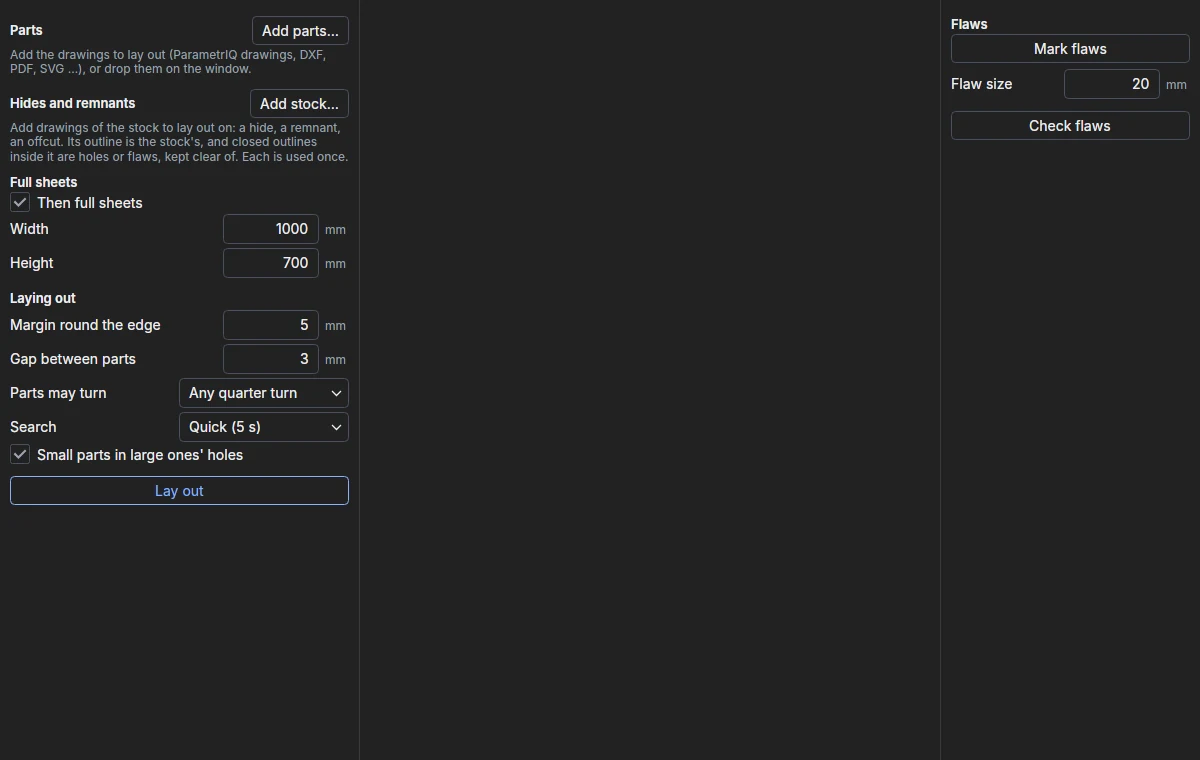
Click Add parts… and choose the drawings to lay out: ParametrIQ drawings and the vector files CAD reads (DXF, PDF, SVG …), several at once. You can drop them on the window too. Each part is listed with its size, or why it can't be laid out, and how many you want. A part is laid out by its outline; holes cut in it (windows, hand holes) are kept, so small parts can go inside them.
Hides and remnants
Click Add stock… and choose drawings of the stock: a hide, a remnant, an offcut. A drawing's outline is the stock's, and closed outlines inside it are holes or flaws, kept clear of. Each piece is used once, in the order listed, before any full sheet.
Tick Then full sheets to lay out what doesn't go on the stock on sheets of the Width and Height given. With no stock listed, the parts go on full sheets.
Marking flaws
Choose a hide in the list, or a page of the layout that is one, to see it. Turn on Mark flaws, set the Flaw size (its width), and click each flaw where it is: it is listed with its size and place, and drawn as a red ring. ✕ removes one. Flaws are kept clear of by the Gap between parts, as parts are from one another.
Laying out
| Setting | What it does |
|---|---|
| Margin round the edge | Kept clear inside the edge of each hide and sheet. |
| Gap between parts | Kept between parts, and between a part and a flaw or a hole. |
| Parts may turn | Any quarter turn, Half round only or Not at all. For leather, whose grain runs one way, turn less. |
| Search | How long to look for a tighter layout: 5, 20 or 60 seconds. |
| Small parts in large ones' holes | A part may go inside a hole cut in another part. |
Click Lay out. Each page of the layout (each hide used, then each sheet) can be chosen at the top of the picture, and under it are what each page took and what was left out.
The flaws check
Flaws are often found after cutting is planned: on the cutting table, under the light. Mark them on the page of the layout they are on and Check flaws lists every part that lies over one (and fills it red), without laying out again. Marking a flaw on a page of the layout checks at once. Lay out again to move the parts clear.
Exporting
Export layout… writes the layout, a page for each hide and sheet with the parts placed on it, as PDF, DXF, CF2, DDES, SVG, HP-GL, PNG or a ParametrIQ drawing (which opens in CAD). Save list… saves the pages, their parts and how much of each was used, then the parts over a flaw, as a list (CSV) for a spreadsheet. Both need the licence.