Barcode Tool
Use the Barcode Tool to place a barcode or QR code: an EAN or UPC for the shelf, an ITF-14 for a shipping case, a Code 128 or GS1-128 for a label, or a QR code, Data Matrix or PDF417. Like a raster image, it is pinned to four corner points, so it moves, turns and scales when they move. It is drawn as filled shapes, so it stays sharp at any size and exports as vectors.
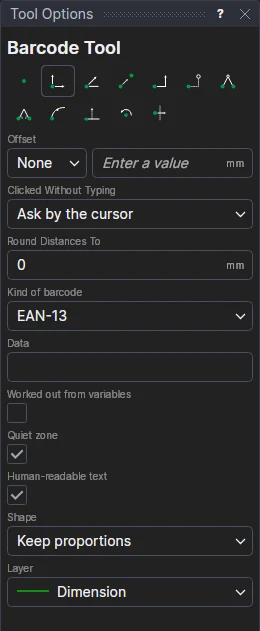
Usage
- Choose the Kind of barcode.
- Type the Data: digits for EAN, UPC and ITF-14 (leave off the check digit and it is worked out), text or a web
address for Code 128, QR, Data Matrix and PDF417, or
(01)09501101530003(10)AB12for GS1. The status bar says what is wrong with data that can't be encoded. - To take the data from the drawing's variables, tick Worked out from variables and type an expression, such as
GTINorCONCAT("https://example.com/",CODE). The code is made again whenever the variables change. - Choose the settings:
- Quiet zone: keep the light margin a scanner needs inside the code's box.
- Human-readable text: print the digits or text under a linear code.
- Error correction (QR codes): L, M, Q or H. Higher survives more damage but makes a bigger code.
- Bearer bars (ITF-14): frame the code, as printed on corrugated board.
- Choose its shape, as for a raster image:
- Keep proportions: click* the bottom left corner, then the bottom right corner. The height comes from the code's usual proportions. The bottom edge can be at any angle.
- Rectangle: click* the bottom left and bottom right corners, then a point level with the top.
- Free: click* each corner in turn.
- Choose the layer to put it on.
The code is shown as you place it. To change it afterwards, select it: the Properties panel shows its kind, data, settings and colour.
Barcodes are artwork: they are exported to PDF, EPS, Illustrator, SVG and DXF as filled shapes, and are never cut or plotted.
*Depending on the chosen snap mode, several clicks may be required to define the point parametrically. Read more about Snap Modes
See also: BARCODE, Raster Image Tool.