Slab Photo Tool
Use the Slab Photo Tool to place a photograph of a slab at full size, so you can lay the pieces out over it and match their veins and colour before the slab is cut.
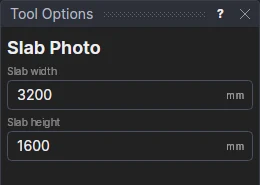
Usage
- Photograph the slab square on if you can (at an angle is fine: the perspective is taken out), and place the photo in the drawing with the Raster Image tool, any size.
- Choose the Slab Photo Tool and fill in the slab's Slab width and Slab height as measured (or as its supplier lists them).
- Click* the slab's four corners on the photo in turn: bottom left, bottom right, top right, top left.
The photo is placed again so the slab is that size, its bottom left corner where you clicked first. Its outline is drawn on the Slab layer, and the photo is put on that layer too: neither is plotted or cut. The sizes are variables (SLW1, SLH1): change them and the photo and the outline follow.
Laying the pieces out
- Copy the pieces onto the slab and move and turn them with the Transform tool until the veins run as you want, across a joint or down a waterfall. Each piece is counted as on the slab its outline is inside.
- Hide the Slab layer in the Layers panel to see the pieces alone; show it to see the stone under them.
- Several slabs: place each photo and run the tool on each, side by side.
- On a 3D page, stone pieces show the part of the slab photo they lie on, so the matched veins show in 3D (and in 3D files exported from it).
- File › Reports… › Stone quote shows each slab's area, the pieces on it and its yield, and can price the stone by whole slabs.
- To show the customer, export the layout as a PDF or an image: the photo is in it. To cut, leave the Slab layer out: G-code and HP-GL leave it out (it isn't plotted), and a machine profile can leave it out of a DXF.
*The corners are taken where you click on the photo, without snapping. Zoom in to click them exactly.
See also: Stone and Tile, Edge Profile Tool.